Form-Based Worksheets are Worksheets that contain one or more form inputs (e.g. checkboxes, dropdowns, text boxes, etc.). Use Form-Based Worksheets for your surveys, intake forms, questionnaires, and any other assignments with a structured set of questions and answers.
(By contrast, a Worksheet that does not have any inputs means the form will be in freestyle mode, allowing the client to edit and modify the worksheet freely - including changing anything written by you!)
Adding just ONE form item automatically transforms your Worksheet into a form-based one, meaning the client will only be able to fill out the form fields you provide.
Form-Based Worksheets typically come in the form of templates -- standard worksheets used in your coaching practice. Templates are handy for when you use worksheets in your Courses, as pre or post Worksheets in Appointments, Group Worksheets, and one-off assignments.
Building a Form-Based Worksheet Template
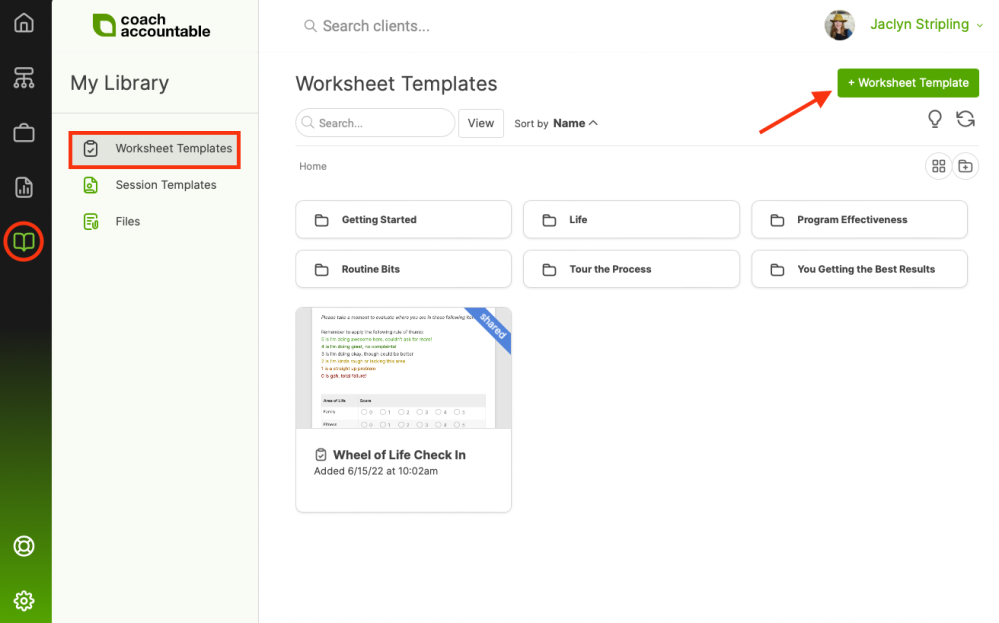
To illustrate Form-Based Worksheets, let's create a new Worksheet Template. You'll find the place to do so in Library >> Worksheet Templates. Once there, click + Worksheet Template.
You'll see a WYSIWYG editor. Let's add a form through the Insert Form Item button found towards the right-hand side of the WYSIWYG toolbar (the icon with a check box and radio button).
Give this a click and you’re presented with an interface for adding in your input of choice.
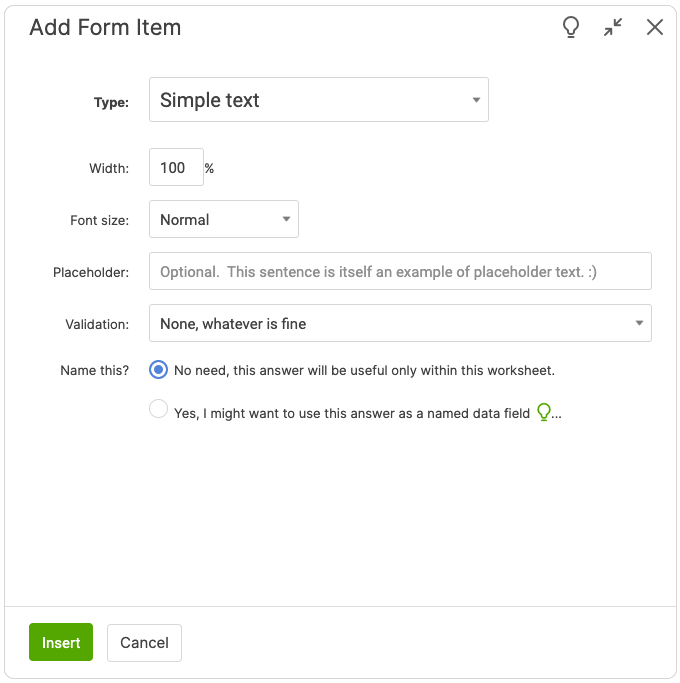
The first option (Type) is the most important:
- simple text box,
- multi-line text area,
- dropdown menu,
- checkboxes,
- radio buttons,
- signature area,
- image prompt, or
- computed value.
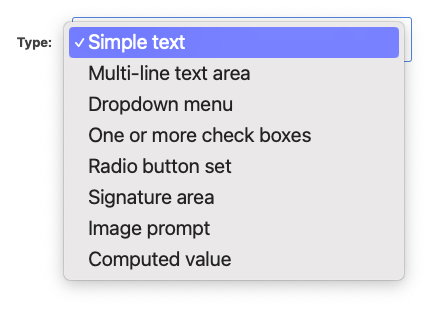
Width refers to the width of this particular form item in relation to the rest of the worksheet as a whole. 100% means this item will span the entire width, 50% means it'll take up half the width, and so on. This is good to know if you're putting multiple form items next to each other or next to the question itself.
Font size allows you to change the size of the input. The options are small, normal, large, and jumbo. This can be handy if you want certain form items to really stand out.
Placeholder text will be an option for simple text and multi-line text areas. This allows you to pre-fill the box to help prompt the client. The placeholder text disappears when the client starts writing, so we recommend you do not write the question to be answered in placeholder text.
Validation asks whether this form item is required. You can use validation in different ways for different types of form items. For example, in simple text, you can require the client to write a number. In dropdowns, you can require the client to choose something other than the first item. In image prompts, you can require the client to upload at least one image. And so on.
Name this? Using this option allows you to compile all the answers to this form item across all your clients in a Data Lab report, to have the data automatically put into a graph for a client by piping it into a Metric, and more.
Simple Text
Let’s make a simple text box for people to type in their answer to the question “How do you feel about form-based worksheets?”:
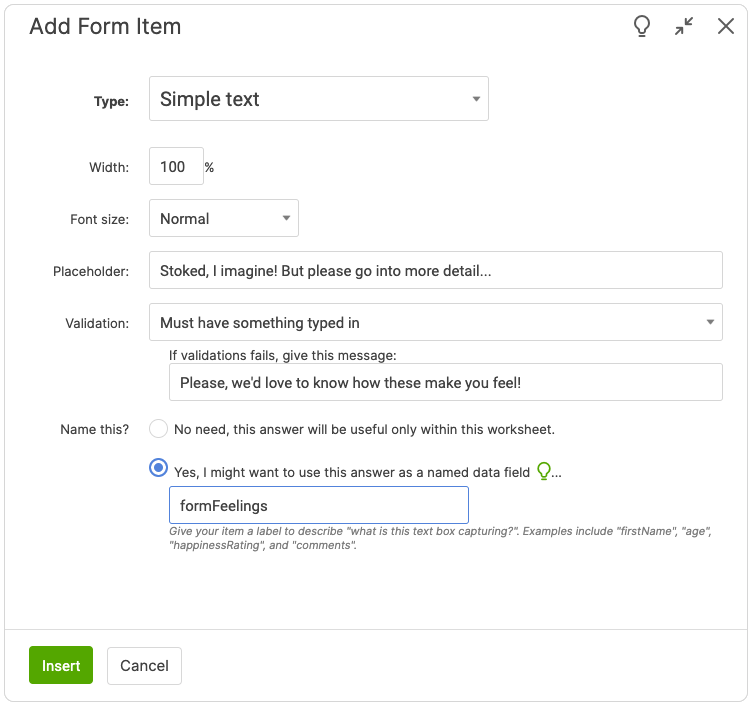
Notice the validation option we picked: that this input must have something typed in. The user is prevented from marking this worksheet complete if this input is left blank, and the system presents them with the message “Please, we’d love to know how these make you feel.” if they try to.
Of special note: hitting the “Insert” button ONLY adds the form item (answer) into our worksheet. It’s up to us to put the actual question. (This is nice in that it gives us flexibility to format questions any way we please.)
In this case we’ll type in the question first, then add the simple text box right after, like so:
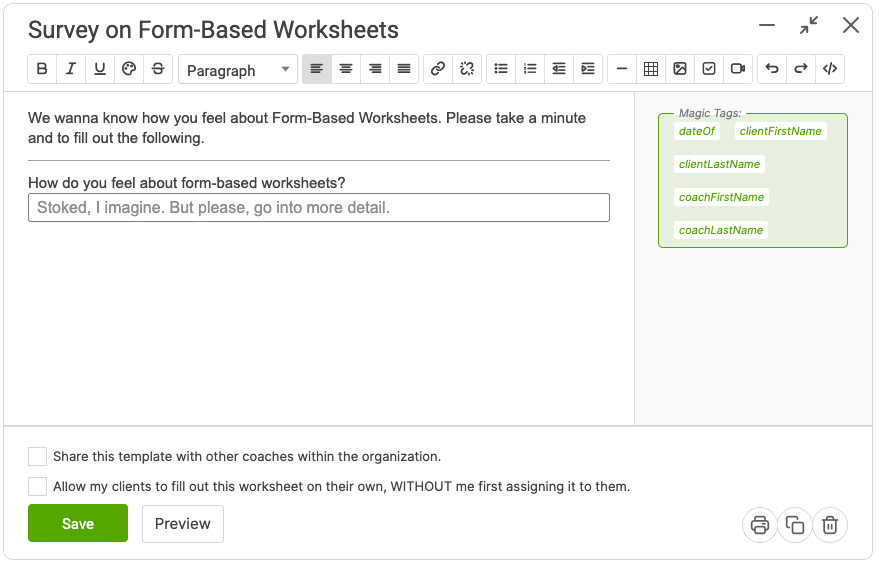
We’re off to a nice start.
Dropdown Menu
Now let’s ask another question, one that's answered with a dropdown menu:
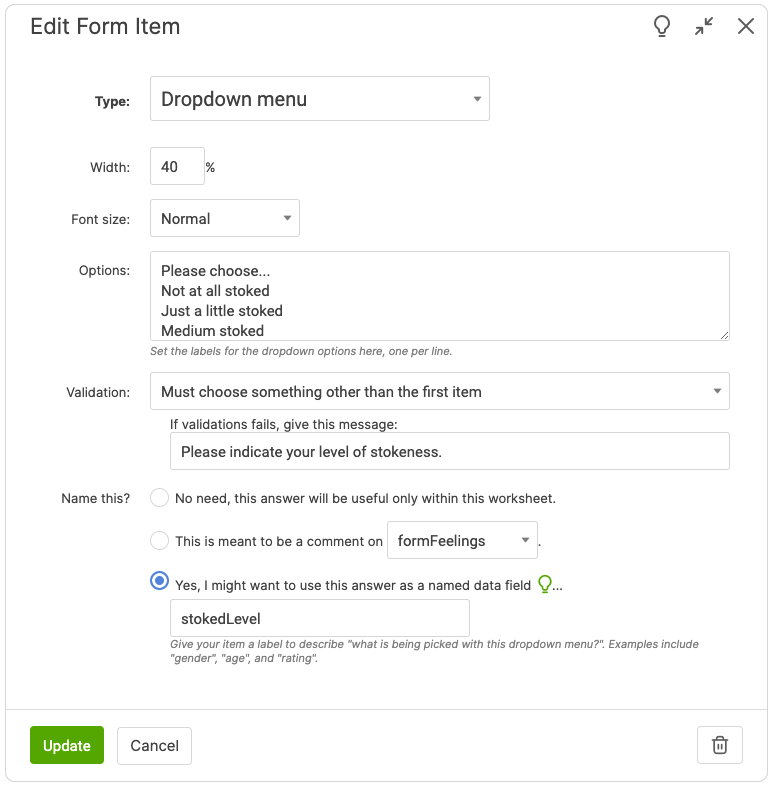
Note the 40% width, which allows this item to sit on the same line as the question.
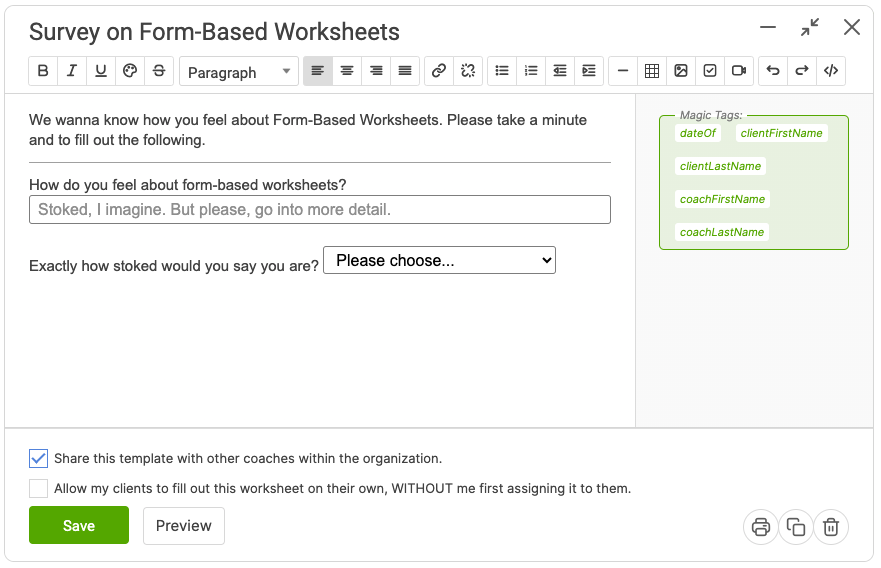
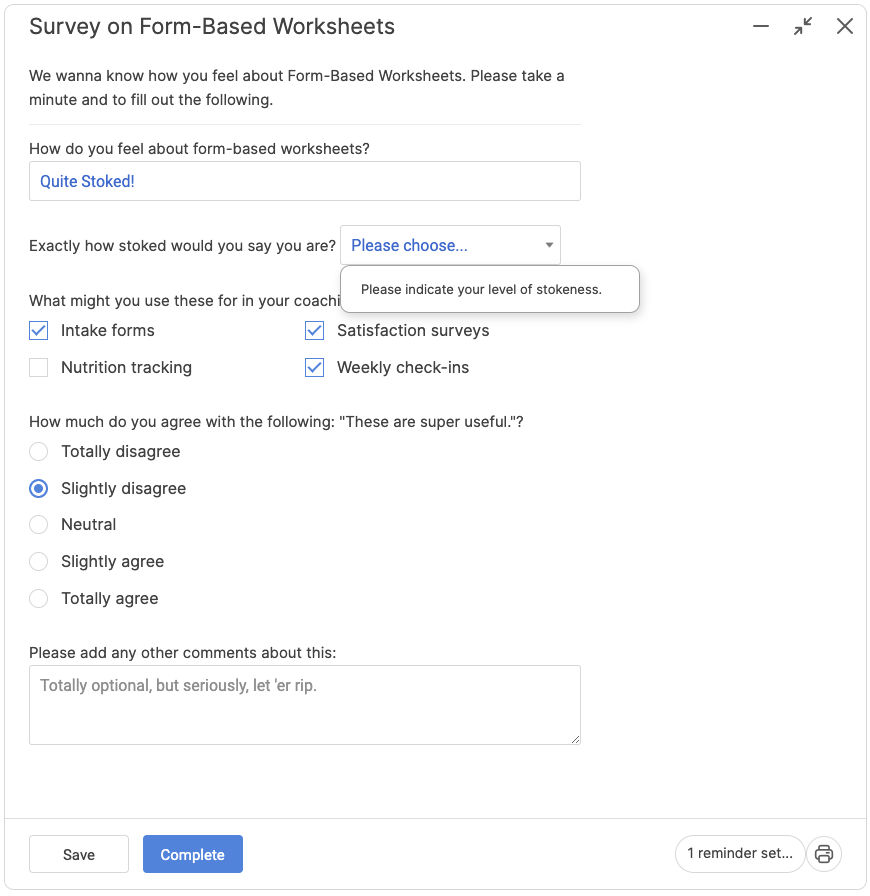
Again here we pick a validation rule, “Must choose something other than the first item.” We put a “Please choose….” option for the first item, which is what shows (and is selected) by default for the client. They’ll be asked to “Please indicate your level of stokedness.” if they try to submit without choosing something other than the first item.
Check Boxes
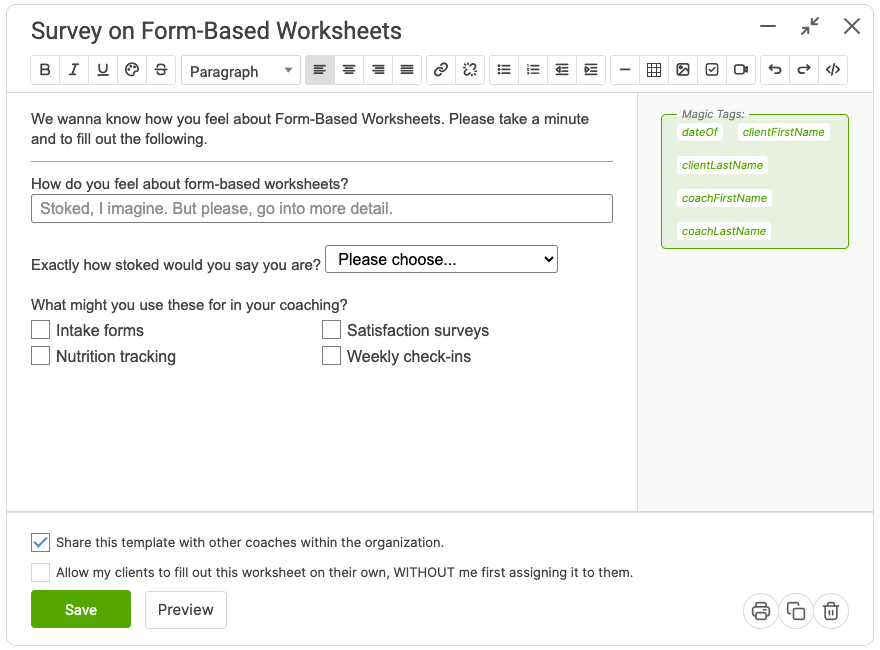
Right then, let’s put in a question asking “What might you use these for in your coaching?”, and present the user with some options. We’ll use check boxes, since the user might want to indicate a few of them:
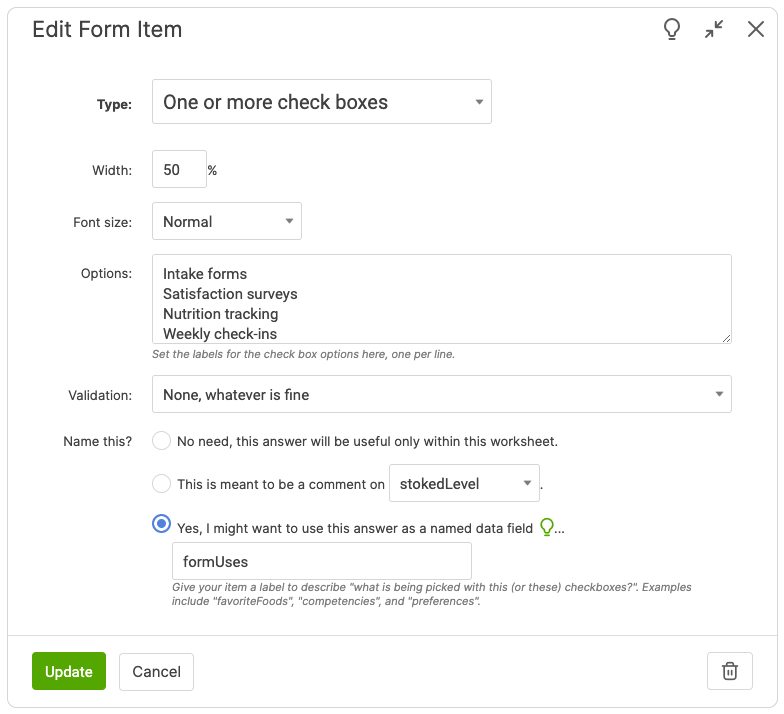
We pick 50% width to let the 4 options all nicely fit on two rows. Width in this case indicates how wide, relative to the entire width of the Worksheet, should each check box choice be.
We type the question and insert those check boxes, which give us the following:
Radio Button
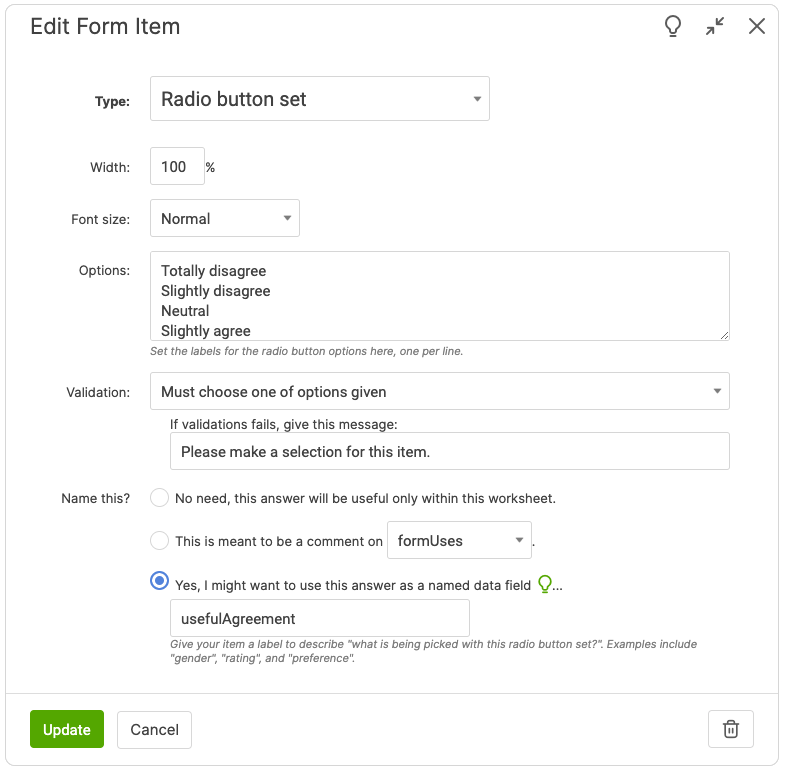
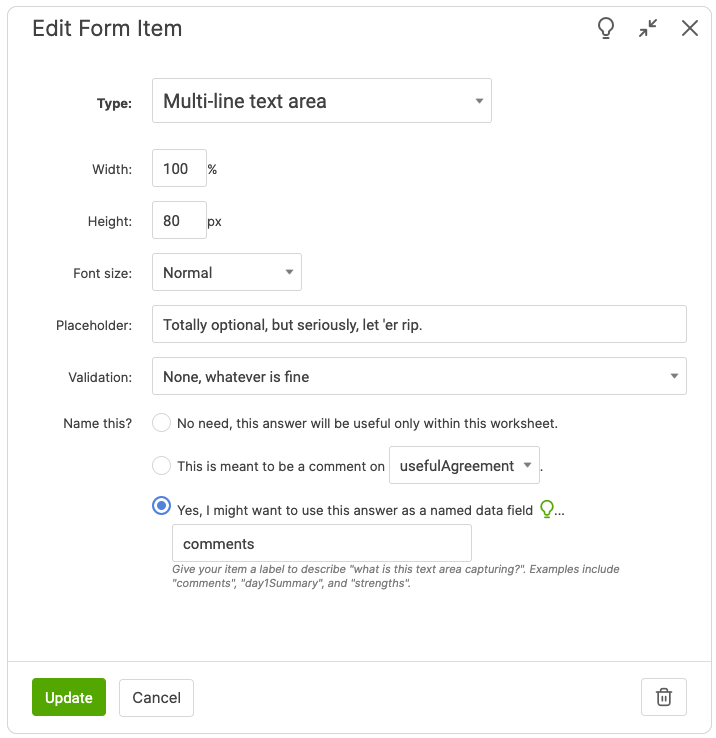
Let’s now add a radio button choice and a comment box to wrap up. We’ll type “How much do you agree with the following: ‘These are super useful.'” and “Please add any other comments about this:” into our template and then insert the appropriate form inputs to match:
Multi-Line Text Area
Here’s the result with our 5 inputs in place:
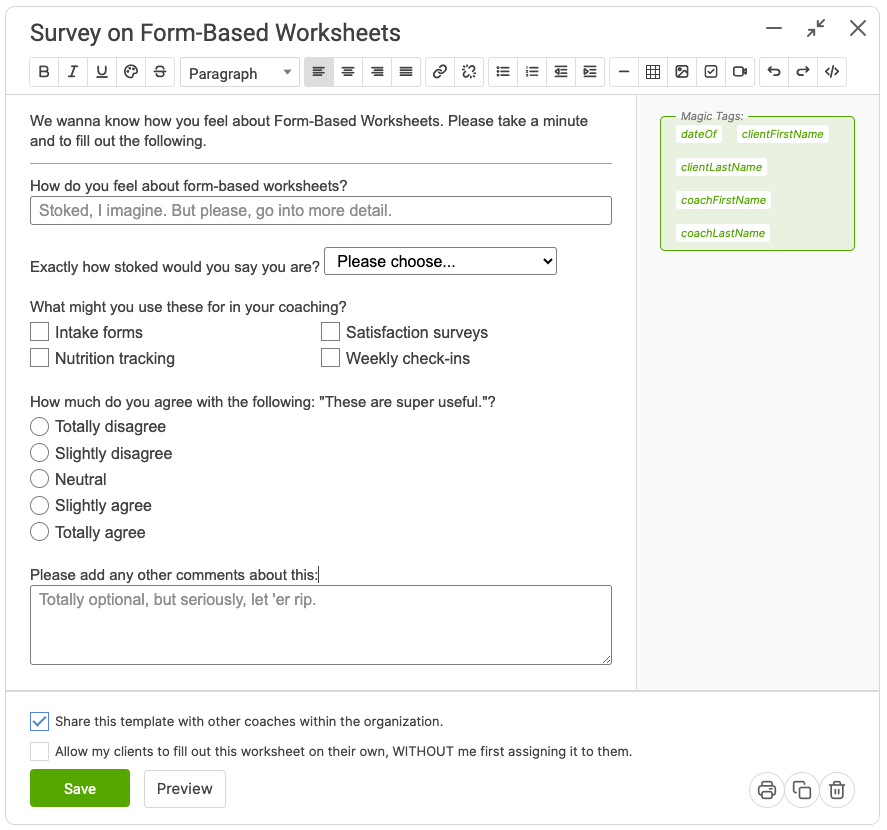
When your client fills it out, instead of the WYSIWYG editor where they can alter the worksheet freely, they’ll be presented with your form with inputs ready for them to fill in.
Client View
Here’s what our worksheet in form mode looks like to your client:
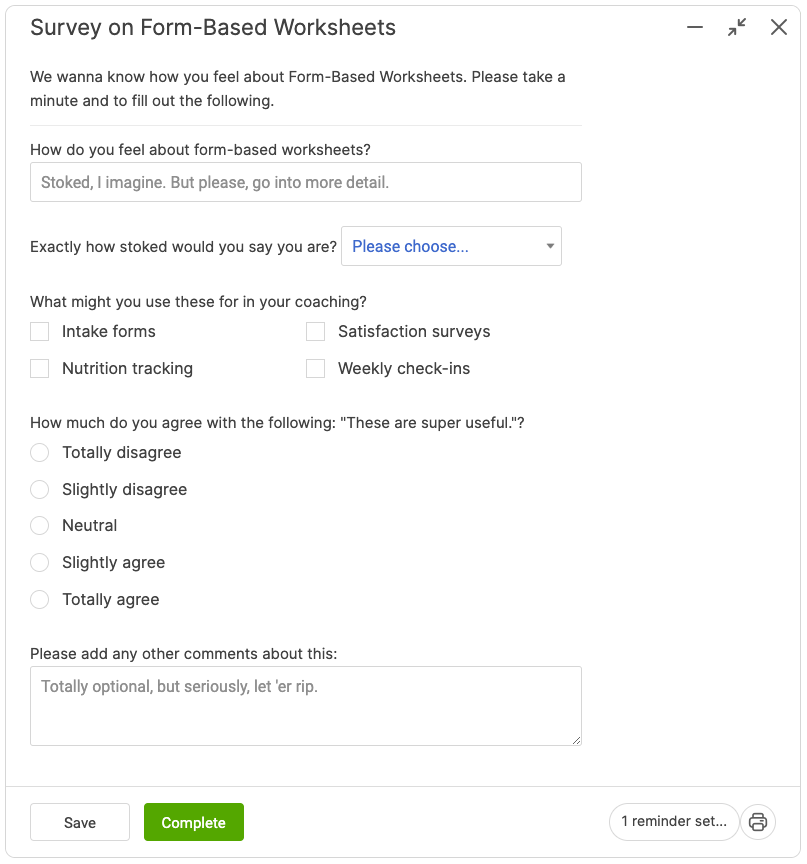
If they try to submit the worksheet without passing the validations you set for each of the inputs, they’ll be lovingly given a notification with the message you set:
Once completed, the worksheet as filled-out goes into the client record under the Notes and Stream tabs, and is emailed right off to you as usual:
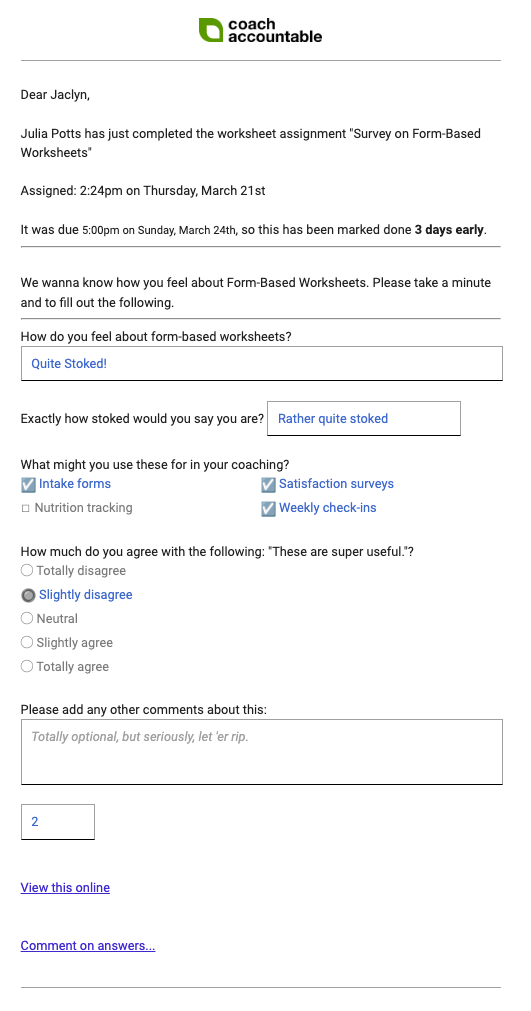
Note the "comment on answers..." text at the bottom - you can comment on each answer individually. More on Worksheet Answer Comments here.
Additional types of form items:
Image Prompt
Use this form item to ask a client to upload an image or multiple images.
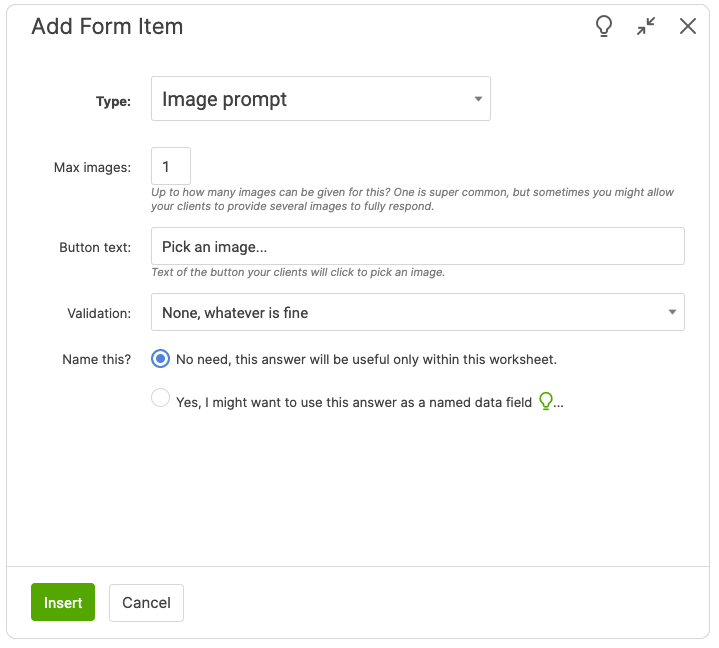
When a client fills out a Worksheet with an Image Prompt, they'll click on the button, which brings up the gallery browser. They'll upload an image (computer or mobile devices all work), and then ultimately choose one for their answer:
As your clients fill out the Worksheet their images are popped right in.
What’s really nice about this is filling out a Worksheet on a smartphone: when uploading a new image to the gallery, most devices give you the option to snap a photo right then, and upload THAT with just a few taps. As such, completing a photo journal Worksheet is quick and easy.
Signature Area
You can also add a form-based Signature Area for the client to sign using a mouse, stylus, or finger. Note: if you're using a form-based Worksheet to create client contracts, we recommend you check out Agreements instead.
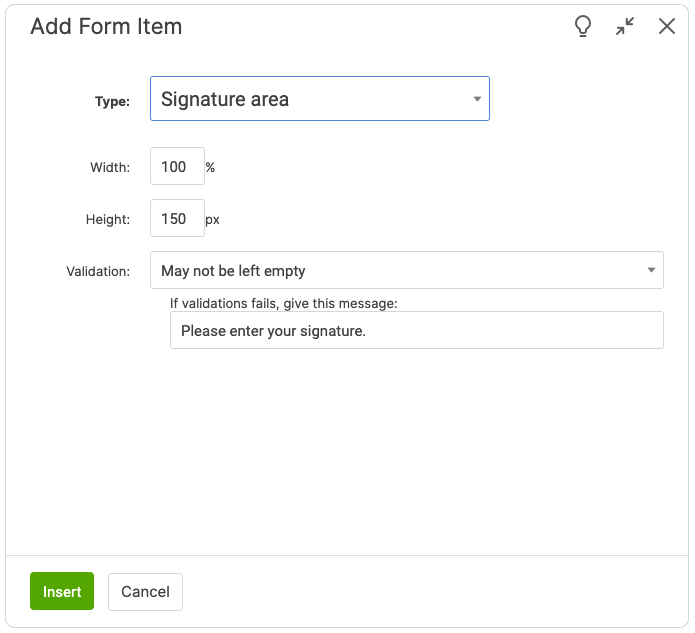
Notice the selections for the signature area: you're really just setting the size, whether the signature is required, and what the text should say if it's required but was not signed.
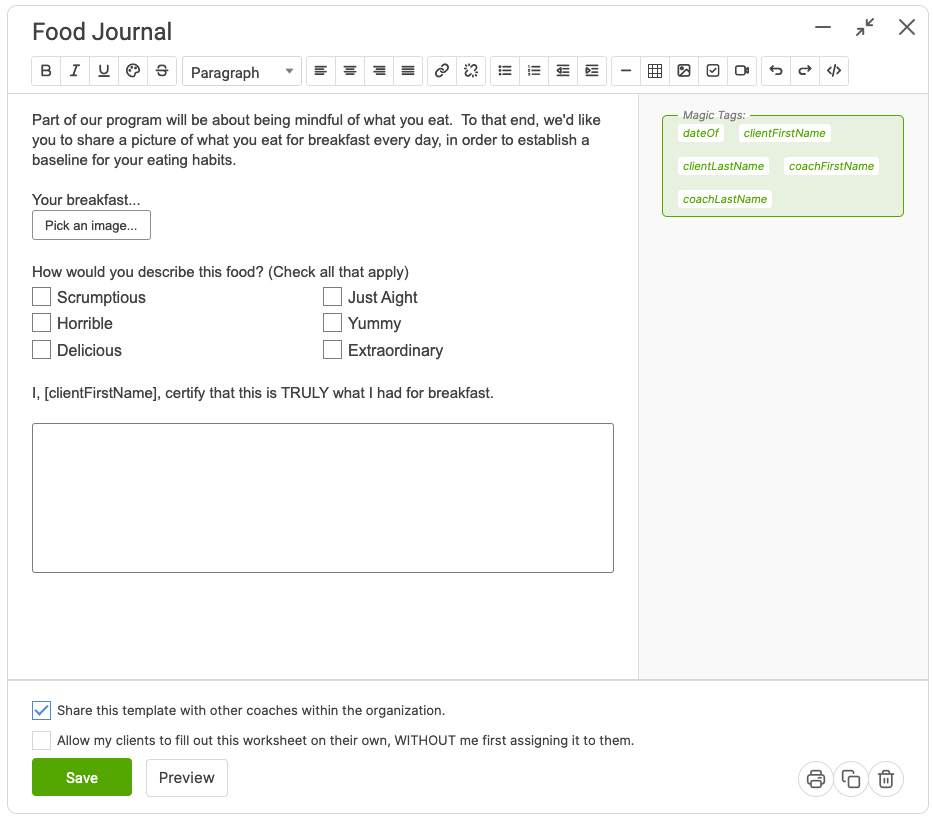
Here's what that looks like on our breakfast questionnaire (bonus: check out the clientFirstName tag, which will, as you might imagine, fill in with the client's name when you assign this Worksheet).
Computed Value
A Computed Value will do some basic math computation with other form fields in the same worksheet. Use these to calculate averages, totals, and more. Read about computed values here.